Monday, December 27, 2010
Merry Christmas and Happy New Year!
I just wanted to pop in for a moment to say hi! I'm taking a little break so I can enjoy the rest of the Christmas season with my family and get ready to ring in the new year. Looking forward to posting more after the new year with winter crafts, Valentine's Day ideas and a sneak peek at my son's 7th birthday party. See you in 2011!
Thursday, December 16, 2010
Kissing Ball
I love to bring nature into my home as much as I can around the holidays. You'd be surprised at how many things still exist when it's freezing, that make lovely additions to your home. I currently have 2 kissing balls, but both are artificial. One is a ball of mistletoe and the other is a ball of poinsettias. But, I was really looking for one made with natural materials.
I saw this boxwood kissing ball on the Pottery Barn website, but unfortunately it was also artificial and $50! Then, I had an idea! We have some boxwoods by our front porch, that I'm sure wouldn't mind having a winter trim. So, I headed outside, snipped some branches, brought them inside and put them in a bowl of water.

I used a small styrofoam ball as my base.

I trimmed the boxwood branches so I had short, 2-3 inch long pieces to stick into the styrofoam ball. I started adding them randomly to the top, bottom and sides, then continued to fill in the spaces.


You could hang the kissing ball or sit it in a decorative bowl or vase.


I just finished it today, so I can't tell you how long it will last for, but I'll be sure to come back and let you know how it's doing after Christmas.
Tuesday, December 14, 2010
Homemade Hand and Body Scrub
One of my favorite products during these cold winter months, is a nice hand scrub. They do a great job of exfoliating and leave my hands oh so soft! But, they can be a bit pricey!
So, I really wanted to try to make some homemade hand scrub for my children's teachers this year. There are a lot of recipes out there, and mine is a compilation of a few with some minor tweaks. Here is what you need:

I prefer a crumbly consistency with less olive oil. I find that the olive oil will not leave behind as much residue, but still leaves your hands feeling soft.
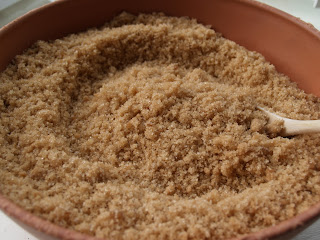
Spoon the mixture into a container and seal with the lid. I hope the teachers are as excited about receiving these as I was to make them!


So, I really wanted to try to make some homemade hand scrub for my children's teachers this year. There are a lot of recipes out there, and mine is a compilation of a few with some minor tweaks. Here is what you need:

- brown sugar
- white sugar
- raw sugar
- vanilla extract
- olive oil
I prefer a crumbly consistency with less olive oil. I find that the olive oil will not leave behind as much residue, but still leaves your hands feeling soft.

Spoon the mixture into a container and seal with the lid. I hope the teachers are as excited about receiving these as I was to make them!


Monday, December 13, 2010
Footprint Penguin Ornaments
Every year since my son was a baby, we've made a handprint or footprint ornament. As the kids have gotten older, it has definitely become harder to find ornament ideas that we haven't already done, or that will accomodate growing hands and feet.
This year, we decided on footprint penguins and they turned out really cute! We used Crayola model magic for the footprint and for the details we used craft foam, sequins and googly eyes.
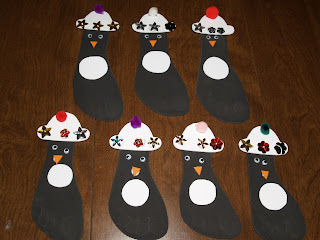

I had a few other ideas, like adding a piece of riboon for a scarf and adding triangle feet, but the kids liked them just they way they were.
I did a post way back in September about our previous handprint/footprint ornaments that you can see HERE. Have fun creating!
Faux Gingerbread Houses
My kids love to decorate gingerbread houses, but they really don't like gingerbread. They will surely eat the candy decorations off of their houses, but the gingerbread usually ends up going to waste. So, last year, I decided to make their "gingerbread" houses out of graham crackers. We did it again this year, and it was another big hit!
I cut the graham crackers to the shapes I needed by using a serrated knife. By using a sawing motion, you can cut the graham crackers without breaking them. I whipped up some royal icing and built our tiny graham cracker houses.

Then I pulled out all of candy decorations. This is a great way to use up leftover Halloween candy if you have any. I love to decorate holiday cookies and cakes, so we always have a ton of candy decorations.


I put some royal icing in a baggie, snipped a corner, and put the kids to work!


We also made Christmas trees this year by spreading green frosting on a pointed ice cream cone and adding small candies.

This kept the kids busy for a good part of the day! And they turned out really cute!


Therapy Packs
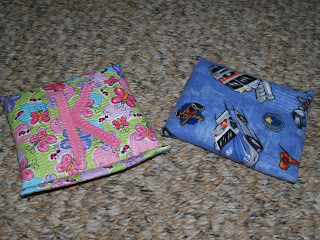
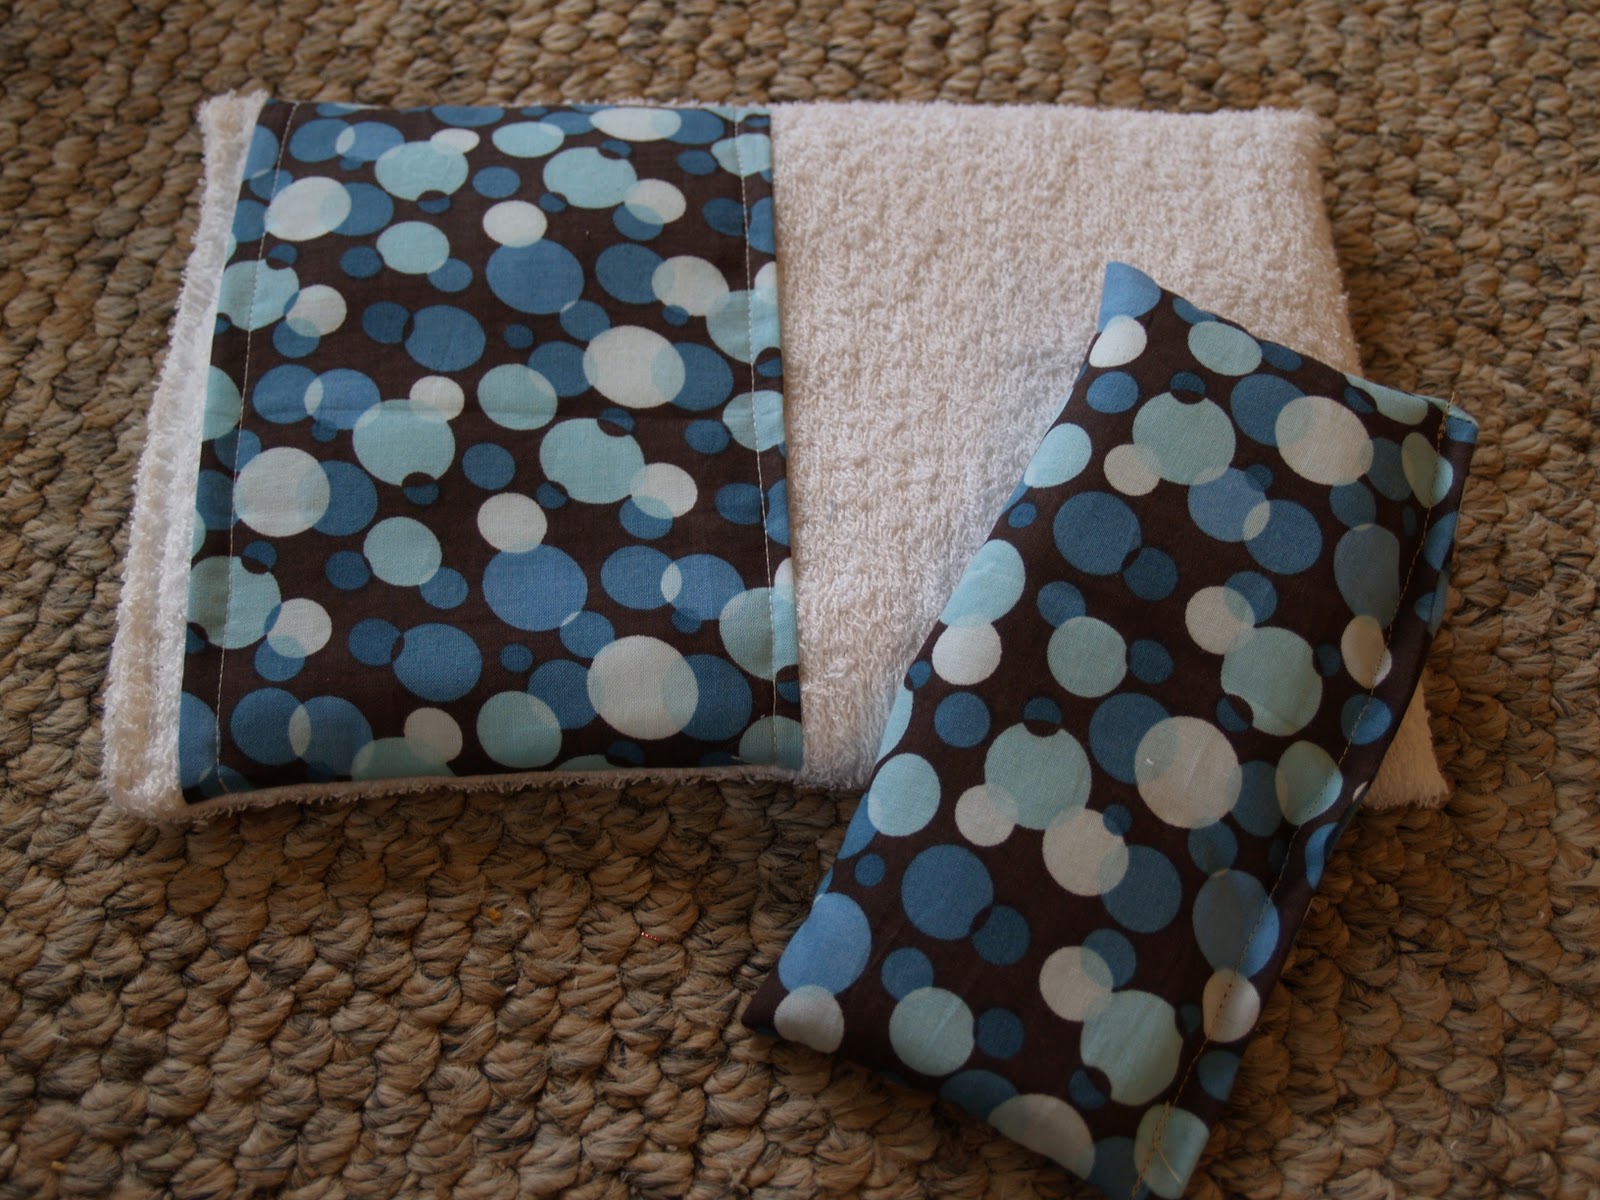
I've seen posts about therapy packs all over the blogging world, and knew that this would be a quick and easy gift to make for lots of people this year - family members, friends, teachers. And best of all, it would also be useful!
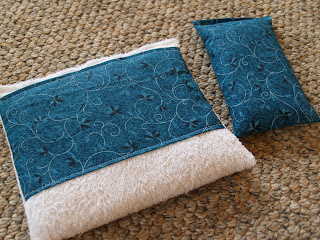
I was lucky enough to find some terry cloth remnants at my local fabric store to make the packs with. To make them look pretty, I used some of my cotton fabric scraps to add a strip of fabric. I essentially made a sack, left one end open, inserted the rice, stitched it up, and was done. For the larger therapy packs, I used about 3 cups of rice and for the smaller eye packs I used about 1 1/2 cups.
I found some great ideas and a cute printable tag over at Sew Mama Sew. I love that these can be used in the freezer or in the microwave, and that they are totally reusable. I made therapy packs, therapy packs with a matching eye pack, a therapy pack/eye pack with a matching towel and smaller boo-boo bag versions for my kids.


Sharing at the following blogs:
Thursday, December 9, 2010
Holiday Hair Goodies
I have a ton of ribbon and I thought I would try to put some of it to use by making my daughter a few hair accessories. I am no hair bow expert, so everything you see here, is plain and simple!
This headband is my absolute favorite! I took a plain white plastic headband and hot glued the red ribbon to it. To make that cute little bow, I just made a loop with those two ribbons, glued them together and wrapped the pink ribbon around the center. The festive red makes it perfect for Christmas, but she can also wear it for Valentine's Day or any other time.

It's that time of year when static reigns supreme, and with my daughters whispy hair, that means trouble. We do a lot of ponytails and braids to keep the hair under control. So, I made two new ribbon ponies. For the first one, I used 2 different green ribbons, wrapped in the center with a piece of red ribbon. And for the second one, I used one piece of wide sheer ribbon, plus 2 pieces of very narrow green ribbon. I tied small jingle bells to the ends of the green ribbon. These ribbon ponies are really simple to make and you can see one of my earlier posts HERE on how to put them together.


And last but not least, is this really simple hair clip. Nothing fancy here! I just hot glued the striped ribbon to the hair clip, then hot glued two pom poms to the top.

Wednesday, December 8, 2010
Pinecone Crafts
This week we used all those pinecones we collected this fall to make some easy and fun crafts.
For our first craft, we used the pinecones to create little pinecone Christmas trees. The kids glued tiny pom poms onto the pinecone to make trees. They loved this craft and made a ton of these.

For our second craft, we used our pinecones to make pinecone bird feeders. We tied a piece of yarn on one end of the pinecone.

Then the kids spread peanut butter on the pinecone and rolled them in birdseed.


Then we hung them on our tree outside.

Since we still had a TON of pinecones left, I decided to use some to create a pretty pinecone hanging. For the hanging, I just glued some pretty ribbon to each pinecone, using a small dot of hot glue to keep it in place. Then, using the loops made from those ribbons, added them to another ribbon, and tied it into a bow. Last, I added a metal loop ring for displaying. I made one with 3 larger pinecones and another with about 6 smaller pinecones. These pictures don't do these justice. I think they turned out really well and look really pretty.


Tuesday, December 7, 2010
Christmas Cards
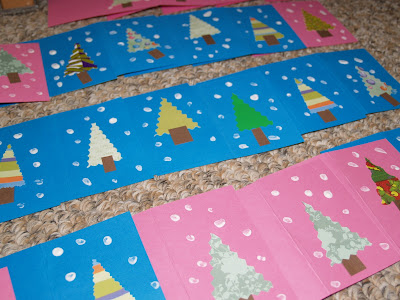
Every year, I put my kids to work and have them make their own Christmas cards for their classmates. This year was no exception.
For this year's cards we used some cardstock I already had on hand, some scrap paper, a rubber stamp, and paint. I cut the cardstock to make the cards, and cut my scrap paper into triangles (for the tree) and rectangles (for the tree stump). I used my decorative scissors to cut out the shapes and the kids glued them onto the front of their cards. They used a q-tip with white paint to make dots of snow on the front around their tree. Last, we stamped "Merry Christmas" inside the card and they signed their name.
Although these were very simple to make they turned out really cute!

Wednesday, December 1, 2010
No Sew Fleece Blankets - Tutorial
I made each of my kids a no sew fleece blanket. I had heard how easy these were to make and had been wanting to make one for some time now, but just never got around to it. With the colder weather finally settling in I decided to go for it.
I found a lot of great tips in various places online, so my steps for making these come from many of those who have blanketed before me.
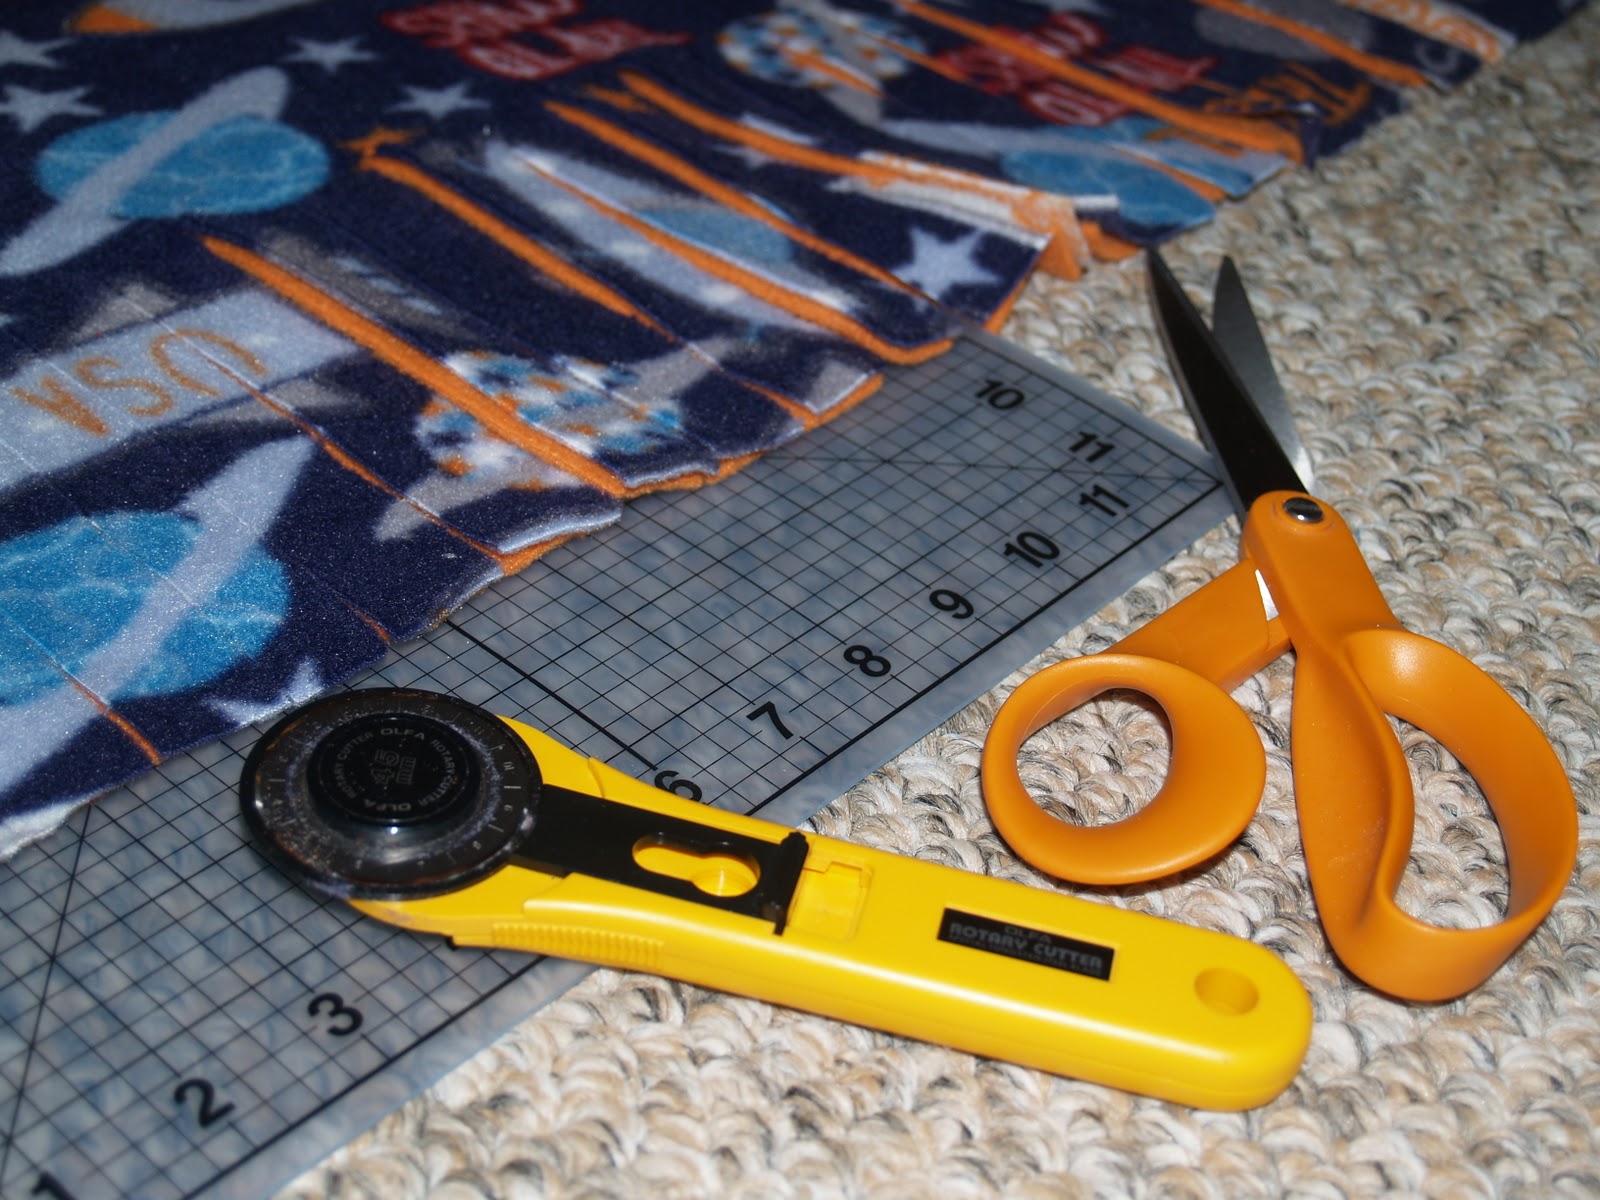
My kids like a big blanket that they can wrap all around themselves, so I started off by getting 2 yards of two coordinating fleeces for each blanket. I found this pretty nature print for my daughter with a matching solid blue, and a space print for my son with a matching solid orange.


I started off by trimming the selvage from each piece of fleece. I then matched up the two coordinating pieces, wrong sides together, to square them.

Once the two pieces were square and even, I cut 6 inch squares from each corner. You would adjust this depending on the size of your blanket and your preference of the size of the fringe.

Next, using my cutting mat, rotary cutter and scissors, I cut a 1 inch wide fringe along each side, making sure to cut through both pieces of fabric. I cut in 6 inches to match the 6 inch square I cut in the corners.

The last part is to tie all of those fringe pieces. I just used a basic overhand knot and doubled it to be sure they stay tied.


All in all, these are pretty easy to make. It did take me some time to figure it all out as I went about it my first time, but by the time I got to the second blanket, I had a better idea and the blanket came together a little more quickly.
And best of all, my kids love them! They sleep with them every night and bring them downstairs to snuggle with while doing homework or watching tv. Definitely worth my time!


I found a lot of great tips in various places online, so my steps for making these come from many of those who have blanketed before me.
My kids like a big blanket that they can wrap all around themselves, so I started off by getting 2 yards of two coordinating fleeces for each blanket. I found this pretty nature print for my daughter with a matching solid blue, and a space print for my son with a matching solid orange.


I started off by trimming the selvage from each piece of fleece. I then matched up the two coordinating pieces, wrong sides together, to square them.

Once the two pieces were square and even, I cut 6 inch squares from each corner. You would adjust this depending on the size of your blanket and your preference of the size of the fringe.

Next, using my cutting mat, rotary cutter and scissors, I cut a 1 inch wide fringe along each side, making sure to cut through both pieces of fabric. I cut in 6 inches to match the 6 inch square I cut in the corners.
The last part is to tie all of those fringe pieces. I just used a basic overhand knot and doubled it to be sure they stay tied.


All in all, these are pretty easy to make. It did take me some time to figure it all out as I went about it my first time, but by the time I got to the second blanket, I had a better idea and the blanket came together a little more quickly.
And best of all, my kids love them! They sleep with them every night and bring them downstairs to snuggle with while doing homework or watching tv. Definitely worth my time!


Subscribe to:
Posts (Atom)